So, you have taken a pottery class or two and have caught clay fever! This is an exciting time, and it’s easy to get overwhelmed when deciding just where to start. Everything is so new, and you still haven’t decided which approach is your favorite. Are you a thrower? A hand builder? A slip caster? Each of these processes require their own set of skills, but if you’ve yet to decide on a specialty, don’t worry – we’re here to help! Today we are going to discuss 5 techniques that are useful across all ceramic processes. By mastering these skills, you will have a solid foundation for exploring all facets of working with clay.
Wedging
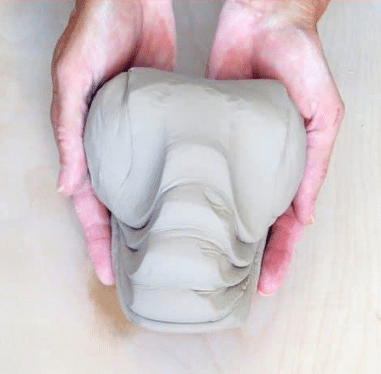
Wedging clay is one of the first skills you’ll need to master as you begin your clay journey, and it’s how you will start almost any ceramic project. It’s the process of kneading the clay, and it’s done to even out moisture, remove air pockets, and align the clay’s particles so that it’s more malleable. There are a few different techniques available to you, and you may notice that different cultures and regions have their own preferences. While wedging looks like an easy task, there is a knack to it that requires a bit of practice, so don’t get frustrated if you struggle a bit at first, we’ve all been there!
We want to make this important skill as easy as possible for you to pick up, so we’ve prepared this easy step-by-step guide!
Making Slip

The glue of ceramics, slip is key to creating strong bonds between ceramic parts. At its core, slip is just liquified clay, but to make it well requires a bit more time than simply throwing some clay in a bowl of water. For the wheel throwers out there, you have it easy; you can simply collect some of the slurry you naturally create while throwing and store it in a sealable container. But don’t worry hand builders – while making slip is a separate process for you, it’s still an easy one! We’ll walk you through all the steps so that you can confidently mix slip on your own, and give you some tips on how to maintain a steady supply.
Scoring & Slipping
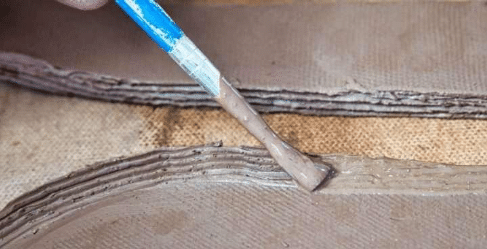
This is an essential skill across all methods of making, but luckily, it is a very straightforward and easy one! All you need is that lovely slip that you’ve just prepared, along with a paint brush, and a scoring tool. There are several options available for the latter, such as serrated ribs, pin tools, and wire-bristled brushes. And, if you prefer to work with what you have, toothbrushes and forks will also do the trick!
Scoring and slipping is done when attaching separate ceramic parts together. The slip acts as your glue, and the scoring (or scratching) increases the surface area for the glue to grab onto. Begin by marking out the area on each part where you will be creating the join. Next, use your scoring tool to thoroughly rough up the surface, being sure to go deep enough to create visible marks. Don’t worry too much if you go outside of your target area, this can easily be smoothed over afterwards. Now you can brush your slip onto one of the scored parts and press your two pieces together. Give them a subtle wiggle back and forth to help move the slip into the scored area and to create a tight bond, you should feel the joint become more secure as you do this. Check that everything is placed as you want, then smooth out the seam with your finger or a damp brush, removing any visible score marks or excess slip. That’s it! You are now ready to make more complex forms!
Making Reclaim

how-to-reclaim-clay.html
Reclaiming clay is an essential skill, not just because it will save you money, but because it reduces waste and is therefore better for the environment. Simply put, reclaim is scrap clay from your making process that you’ve reconstituted for reuse. Reclaiming can easily feel like a bit of a chore, but if you set up an effective system, it actually requires little labor and space! Preparing reclaim is also an excellent way to hone your wedging skills!
For an easy step-by-step guide on how to reclaim your clay scraps, check out this beginner’s guide on reclaiming!
Proper Drying
cracking-while-drying/
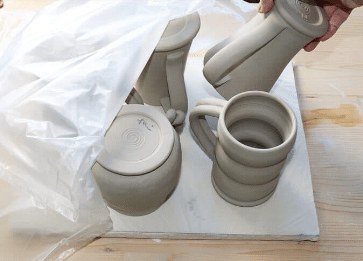
Every potter at some point will experience the heartbreak of cracked and ruined pots due to impatience or ineffective drying, and this is because drying is the point in the process where clay is at its most vulnerable. As it dries, a significant amount of the water content of your clay evaporates out, causing your piece to shrink. If some areas dry faster than others, they will also shrink faster, resulting in those disappointing results. Luckily, there are plenty of strategies you can incorporate into your drying process to avoid these problems!
We’ve put together this handy guide to help get you started, and to give you tips on how to work with specific challenges.
Now that you have learned these 5 essential skills, you can feel confident in your clay journey. You have a strong foundation of abilities to support you as you experiment and play, and will have more consistent and positive outcomes. And, as always, if you have any tips or tricks of your own, be sure to share them in our Member’s Forum (or sneak on over there to discover tips from other potters to help you go from amateur to expert)!



Responses