
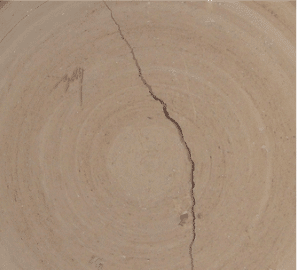
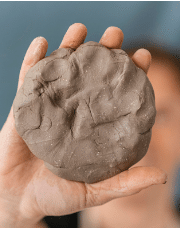
We’ve all experienced it: the crushing moment when we return to the studio after a successful session, only to find pieces cracked and unusable. Or, in another common scenario, everything looked great going into the kiln, but we later opened it up to discover our pieces cracked, or worse yet, completely exploded! Not to worry, though! In almost all cases, instances such as these are due to the same culprit: moisture. Knowing this makes it an easy problem to solve, and today we’re going to help you do just that with some tips and tricks for drying your clay.
Why Moisture Causes Cracks
8-eight-steps-to-stop-crazing
As you’ve likely already learned, clay shrinks as it dries. This phenomena is caused by moisture evaporating out of the clay, drawing the particles closer together. If some areas of your piece dry faster than others, they begin to shrink at different rates, which creates stress. The clay’s response to this stress is to crack. For this reason, the most important consideration is not so much the speed at which you dry something, but rather the evenness of the drying.
The other way in which moisture causes cracking or breaking is in the early stages of the firing process. While our piece may feel bone-dry to us when we put it in the kiln, the clay actually still contains water. This is because the clay molecules themselves are chemically bonded with a certain amount of water molecules. This bond is released with the introduction of heat, and then the water evaporates away. During this process your clay is quite vulnerable. If the heat increases too quickly, the water turns into steam faster than it can escape the clay walls, creating pressure within. This results in cracks, or even explosions. So the key here is to fire slowly during this important stage.
Things that Impact Drying
When deciding how to dry your work most effectively, there are a number of things to take into consideration. Let’s take a look at the main ones below:
Climate

The humidity of your environment can have a huge impact on the rate your work will dry. If you live in a dry climate, you will have to take extra care to slow the rate of drying. On the other hand, if you are somewhere with high humidity you will have more time to work or leave things uncovered, but you may find the drying process frustratingly slow.
Clay Body
Different types of clay are more prone to cracking than others, and therefore may require more care when working and drying. As a general rule, the more plastic the clay, the more it will shrink, and therefore the more vulnerable it is to cracking. Grogged clays and stiffer clays generally shrink less, and can be dried with less vigilance.
Size and Thickness of Your Form

_18e6766f00_o.jpg
Working large is very exciting, but it does present some extra challenges! The larger your form, the more likely it is that the moisture can become uneven. This is largely due to the increased time you are working on the piece, but it also relates to the thickness of the walls. Often working bigger requires thicker walls for the sake of strength, and this can slow down drying and also make it more difficult to judge. This holds true for thick walls in smaller pieces as well.
Have you been wanting to scale up your work but aren’t sure where to start? Check out this sculptural workshop with Hirotsune Tashima, where he’ll show you how he builds his life-size sculptures!
Shape and Complexity of Form

building-complex-surfaces/
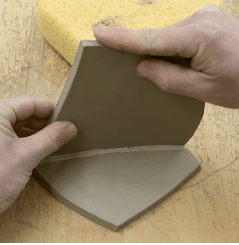
Complex forms present several challenges when it comes to drying. The first is that there are likely to be multiple joins in such pieces, and these are always vulnerable spots. If the parts we are joining are at different levels of dryness, they are also at different points in the shrinkage process, which is just asking for cracks! When you add slip into the mix, which you’ll generally need to do for a secure join, you are reintroducing water in a very localized way, which also impacts shrinkage and therefore cracking.
Another common occurrence in complex forms is that the walls are uneven, or there are protrusions. You may have a spine jutting out from your sculpture, or a delicate handle attached to a mug. Such parts may not only be thinner than the rest of the form, but they have more surface area exposed to the air, causing them to dry faster than the body they are attached to.
The final consideration with form is the overall shape. A form with an opening or rim is prone to uneven drying around that opening, again because of increased surface area. On the other hand, a closed, or near-closed form has difficulty drying on the inside, as the air has difficulty penetrating within.
If the thought of extra care is no deterrent for you, and you are interested in increasing the complexity of your forms, check out this fantastic workshop at The Ceramic School with Drew Caines!
Airflow
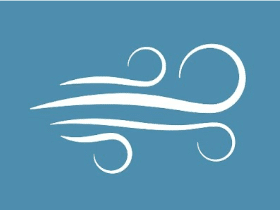
The final consideration is the airflow around your work as it dries. If there is a directional draft in your studio, say from an open window, the surface of your work facing that draft will dry faster than the rest of the piece, increasing the risk of cracking.
Myth-busting Time!
Contrary to popular belief, one of the things that does not cause cracking directly is air pockets. We know this goes against everything you were taught in grade school, but air expanding in the kiln resulting in explosions is simply not a thing. What air bubbles do cause, aside from thin weakened areas in the walls of your pots, are enclosed areas where it’s harder for moisture to leave the clay. If your work is dried too quickly and it has some air pockets, the moisture in these areas may not have had enough time to evaporate out, and it’s this residual water that will cause your work to crack in the kiln. If you are worried your pot has some air bubbles, simply dry it very slowly.
Effective Drying Starts With Your Making
As you may have now gathered, a lot of the things we do while making impact how our piece will dry. This is actually great news! If we keep these things in mind while we work, we will have more successful outcomes, and will avoid or reduce potential hazards.
Here are some tips for helping the drying process as you work:
Wedging
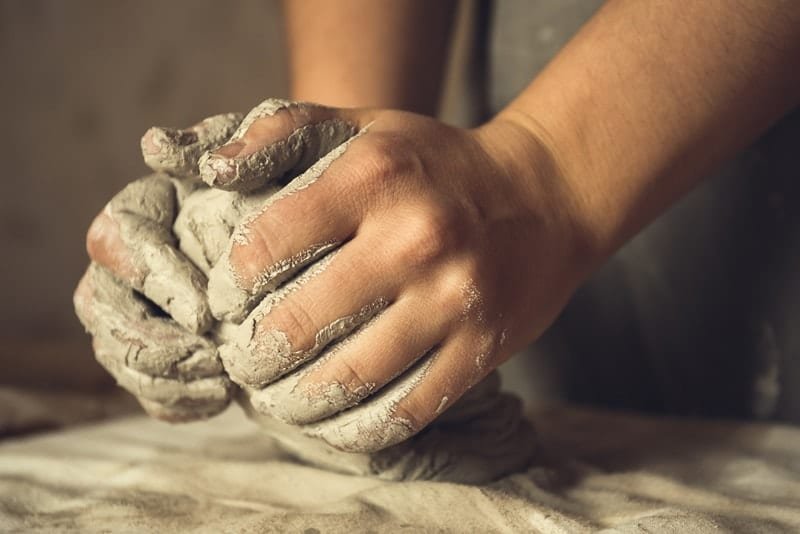
We know you’ve heard it before, but we’re going to say it again: every good pot starts with good wedging! One of the main reasons we wedge is to even out the moisture in our clay. Taken right out of the bag, it’s often a bit stiff on the outside, and soft in the middle. Wedging gets rid of this discrepency, and it also gets rid of excess moisture in the case of too-soft clay, making our building or throwing process easier.
If you need some advice on wedging, head on over to our beginner’s guide here.
Know Your Clay
Think about what form your piece will take and what type of firing you’ll be doing when you are deciding on which clay to use. If you are working small and want thin walls, then by all means go for that luscious porcelain! But if you are doing a large sculpture with tons of joins and thick walls, this highly-plastic clay is not the best choice. Go for a stiffer grogged clay that can better cope with these requirements, as well as better endure prolonged handling.
This isn’t to say that you can never push a clay body outside of its normal use, simply go in knowing that extra care will be required. If you do want to create that large sculpture out of porcelain, spend extra time securing and blending your joins so the bond is super strong.
When it comes to firing, some clays are better designed for thermal shock than others, due to the ease at which they go through that chemical water-release process. Grogged clays again are better performers here, so if you are looking to do a rapid fire, such as raku, consider working with these types of bodies.
Taking Care of Your Joins
As we mentioned, joins are a point of vulnerability, so it’s important to mitigate any issues as much as possible as you go. One of the best ways to do this is to make sure your pieces are at the same level of dryness during the moment of attachment. You don’t want to attach a just-pulled handle to a leather-hard pot, or a stiff handle to a just-thrown body. It does take some practice to master the timing of this, but once you know your clay well you will get it down pat. Remember to keep in mind that slender pieces will set faster due to their greater surface area, so you don’t have to pull handles the second your form is off the wheel.
Another consideration with joining is your slip. Different artists have different preferences with regards to this, but we recommend a slip that isn’t too runny. You want to introduce as little additional water as possible. Equally important is to not apply the slip too thickly, and to remove any excess slip that has squeezed out as you’ve pressed your parts together. Leaving this can not only be unsightly, but it increases the localized moisture more than necessary.
Once your parts are successfully attached, you may want to provide some extra protection, particularly if they will remain exposed to the air while you continue to work on your piece. A great way to do this is to cover the area of the join with wax resist or liquid latex. This greatly slows drying in the protected area, and is a great trick for protecting protrusions and thin areas as well. If using latex, remember to carefully remove it prior to firing.
Know Your Form

Some forms present unique challenges, as you’ve learned. We’ve mentioned that the wax resist trick can be used for thin areas and protrusions, but what other shapes need special considerations as you work?
Rims are a common feature of many pieces, and they definitely want to dry faster than the rest of the work. One way to slow this is to gently place a piece of dampened newspaper over the rim, to provide a wee bit of extra moisture to the area. You can seal the paper in place by running your finger across where it’s in contact with the rim. This has the added benefit of reducing the risk of your rims distorting. You can also place open forms upside down, once strong enough, while you wait to attach any additional components.
For closed forms, you’ll want to take measures to help the inside dry. The most common way to do that is to create a small hole or two in inconspicuous places. This will allow enough air inside to help you out. It is worth noting here that you can in fact fire fully closed forms! As we just mentioned above, air pockets causing explosions and cracking is a myth! Air in your pot only facilitates kiln explosions because it makes the piece harder to dry, but it’s the water that causes the damage, not the air itself. It is possible to fully dry and successfully fire a closed form without an air hole, it simply requires very slow and careful drying and a slow firing schedule. In most cases adding an air hole speeds up this process enough to be worth the small aesthetic impact, but it’s by no means essential.
Bigger Works Requires Greater Care

isupov-sculpture-as-canvas/
There’s a tricky balance that must be struck when building large, as you need the lower portions to be strong enough to support the successive layers, but you also need to keep them from getting too dry to continue working. Because of this, you’ll be adding soft clay to firmer clay, breaking that rule we just discussed above, about joining parts of equal moisture. These types of pieces are also exposed to the open air for longer, as they take longer to make.
To keep lower regions and completed sections from getting too dry, wrap them with plastic as you work, remembering to do the inside as well if you are building a hollow form. This will slow the drying and reduce the disparity in moisture between the finished areas and the in-progress ones.
If you are working over several days, you’ll need to tightly cover your piece with thick plastic between sessions. If your form is open and you’ll be continuing to build out from that opening, add a layer of damp newspaper or rags to the rim between the clay and the plastic, to keep it soft enough for the next session. You can also add a damp sponge on your board beneath the plastic covering, to help maintain a humid environment and facilitate the even distribution of moisture.
Using Shrinkage Slabs

If your piece is very large or heavy, especially with a broad base, consider building a shrinkage slab. A shrinkage slab is a thick slab of clay made from the same clay as your piece, and it sits under your work during both the making and firing process. The slab acts as a moveable and fireable board that will shrink along with your piece, eliminating any resistance between your piece and work surface as your clay shrinks during making and firing.
To be effective, the shrinkage slab does need some assistance and preparation. Start by spreading a thin layer of silica sand on your regular board, followed by a layer of cotton canvas. Cut the canvas so that it is several inches larger than your board, enough that you can easily and firmly grasp it. Next, build your slab on the canvas, coating the top with a layer of kiln wash. Once the wash has set, you can begin to build your piece. The silica sand acts as ball bearings, allowing the slab to slide across the board’s surface as it dries, while the canvas will help you slide the slab and your work off the board and onto the kiln shelf. The canvas will remain under the piece and simply burn out in the kiln. Take care not to let your slab dry out as you work. The idea is that it shrinks with your piece, so both need to be kept at the same level of moisture.
Once you’ve finished your piece and it’s been carefully dried, set your board next to a kiln shelf so they are at exactly the same height. Add a layer of silica sand to the shelf, grasp the edge of the canvas, and carefully drag the canvas, and the slab and work on top of it, onto the shelf. Be particularly careful to pull across without lifting up, as this can break your slab. Once it’s transferred to the shelf, feel free to trim away the excess canvas. If you like, you can avoid the precarious transfer process by using a kiln shelf as your work board. The sand on the shelf, in addition to helping the transfer process, will help the slab slide across the shelf as it shrinks in the firing, greatly reducing the risk of cracking.
Let’s Get Drying!
You’ve carefully made your work employing all the necessary precautions to reduce cracks, and now you are finished and ready to let it dry out. At this point we’d love to be able to simply cover and walk away, but for best results, your precious pieces will continue to need some attention.
What You’ll Need
Plastic Sheets/Bags
Having at least two different thicknesses is helpful and gives you more control. We like using recycling bags and compost/food waste bags. Transparent plastic is also ideal as it allows you to monitor the work through it, and the added visibility can prevent you from accidentally knocking your piece if you need to make adjustments.
Wooden or Plaster Boards/Bats
These will help absorb the water from the bottom of the piece, which is important as gravity pulls the water downwards as it dries and you need to give it somewhere to go.
Wooden Dowels or Strips
You’ll need these if your piece requires the tent drying method, which we’ll discuss below.
Clay, Wood Glue, or Nails
Also for the tent method. For a basic set-up you can use the clay to support the dowels, but if a sturdier tent is required, you’ll want to create a fixed frame using wood and nails.
Tape
Tape is useful for turning your shelves into a large drying tent, which we’ll also discuss, and can be used to help wrap plastic on any parts requiring slower drying (similar to how we used wax resist and latex).
Also useful are dampened newspaper to protect rims, and damp sponges or rags to help maintain a humid environment for more complex forms during the early stages of the process.
Drying Simple Forms
should-dry-before-firing/
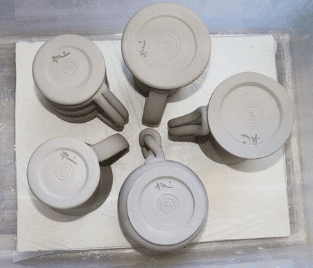
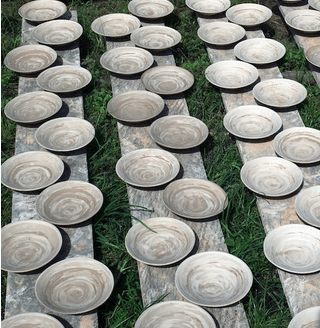
For many forms, the drying process does not have to be complicated. It’s more an issue of care and time than it is difficulty. Have some clean dry boards ready, and place your pieces on top. If you like, you can layer a bit of newspaper to help the pieces move as they dry, particularly if they have broader bases. To help slow the drying process, place your pieces tightly together, with handles or delicate parts facing towards the center, where there will be the lowest airflow. And, if your forms are strong enough, place rims downwards. This reduces the amount of surface exposed to the air, and takes advantage of gravity’s tendency to pull moisture downwards.
If there are any joins at all in your work, cover tightly for 1-2 nights with your heavier plastic. This gives the moisture in the clay time to even out, which will help prevent cracks where you’ve used slip, or where one piece was slightly drier than another at the time of attachment. Try to keep the plastic from touching the pieces, as this can create wet spots. If needed, stick your dowels in balls of clay beneath the plastic to create a temporary tent, keeping the plastic up and in place. Tuck the plastic under your board, so no air can get in.
After a day or two check on your pieces. At this point you can either stick to the heavy plastic, but leave it untucked at the bottom, or you can switch to your lighter plastic. We recommend the latter, as this will allow a more even airflow. If sticking to the heavy plastic, flip it over or inside out if it has built up condensation during the first stage. The length of this stage really depends on your studio environment and climate, taking anywhere from a couple of days to several weeks. The key is to keep an eye on the work, changing the plastic if there is any condensation. After a few days you can spread the pieces out a bit to increase the airflow, while keeping everything covered.
Once your pieces are dry-leatherhard and they seem even in color, you can uncover and let them dry in the open air. Remember to avoid any drafts in your room or direct sunlight, as this can create uneven drying during this final stage. Once your pieces no longer feel cool to the touch they are ready for the kiln!
Bonus Tip: If you have a lot of work to dry, consider making your shelves into their own drying cupboard. After the initial moisture-evening stage, instead of individually wrapping each board, place your boards on your shelves, and then cover your entire shelving unit in plastic using tape. Remember to do the back and the sides, making sure all seams are tightly taped with no draft-causing openings. You can even create a door flap to make checking on your work easier. This is a super handy set up for production potters, and it’s great to keep a shelving unit expressly for this purpose!
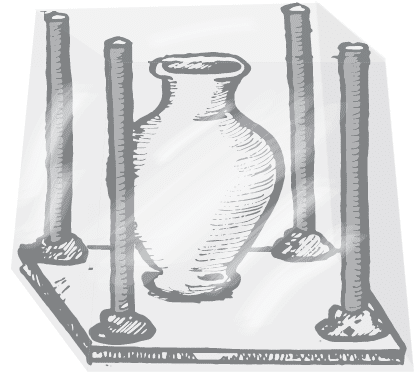
Drying Complex and Large Forms: Let’s Build a Tent!
Larger or more complex forms require a bit more care when drying, but it’s really just a matter of combining techniques that we’ve already talked about. Start by using your wax resist or liquid latex to protect your more delicate or thinner sections. Next, you’re going to construct a more stable tent. While dowels supported with clay work great for simple pieces, you’re going to want something a bit sturdier for complex forms, so there is no risk of the piece getting knocked by falling stilts, and so it’s easier to remove and check your work.
To create your tent, you will be building a 4-sided wooden frame that is 2-4 inches larger than your piece on all sides. Use wooden strips, choosing a thickness that will be sturdy enough to support the size of frame you need. If you regularly make similar sized work, you can reuse your tent over and over, so it’s worth making it strong. Your frame will need strips across the top and bottom of all sides, and you can consider putting in diagonal supports on each face for extra strength if you wish. Across the top, place one strip in the center going either widthwise or lengthwise. This will slightly raise the center of your tent’s roof, encouraging any condensation to run downwards to the sides, rather than building up on the top and raining on your piece. Assemble with wood glue and either nails or screws.
If you plan on reusing your tents, consider making two of each size, one with thick plastic and one with thin plastic, and stapling the plastic in place. Leave an extra couple of inches of plastic around the bottom so it can be tucked under your board or sealed down to cut airflow during the first stage of drying. If you want to stick to a single frame, you can tape your plastic in place and simply switch it out when needed.
Once you have your tent built, the drying process is the same as we previously discussed, though you’ll likely want to take things a bit slower. Consider putting a damp sponge in the tent for the first day or two to create some humidity and help even out the moisture. Keep a close eye on things, paying special attention to thicker or thinner areas. One of the great things about the tent is that it can be lifted up and off the piece quite easily, with little risk of your plastic snagging your work. If your piece and tent are particularly large, consider putting a door flap on your tent to make checking easier.
When You Can Dry Faster, and How to Do it
There are definitely occasions where you can be more relaxed about this whole drying business! If your form is very evenly walled and it has little to no joins, then drying in the open air is a great option for you. You’ll still need to keep some considerations in mind, however, such as avoiding drafts and direct sunlight. So if drying outside, aim for shade, and rotate your work regularly. If you’re drying in the open in your studio but there’s a bit of a draft, consider drying your piece on your wheel while it’s on a slow setting. This will keep it rotating, so no one side is getting the brunt of the breeze.
What to Do When Things Won’t Dry
Sometimes the humidity is our worst enemy, and pieces simply won’t dry to the point we need them to. Or, probably more commonly, we’re facing a tight deadline and need to speed things along. Don’t worry, we’ve got you covered with a couple of handy tips! Remember, evenness of airflow is more important than speed, so as long as you keep this in mind, you can help speed your work along.
Using a Heat Gun
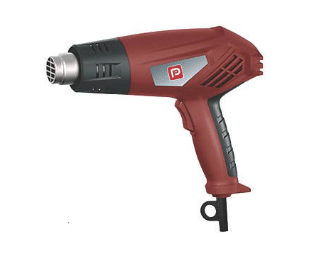
Heat guns are a fantastic tool for the studio, and a very affordable one at that. They’re great for helping the drying process along, provided you keep things moving. For best results, set your work on a banding wheel and rotate it while holding the heat gun steady. Raise and lower the gun to cover the entire height of your piece as it rotates, and don’t forget to do the inside if it’s an open form. Most heat guns have two settings, high and low, and either are fine, though start with low first to see if it’s sufficient. You can also play with the proximity to your piece to find what works best. Remember to pause and check your work frequently to make sure everything is drying evenly.
Hanging Light Bulb
This is a handy trick for large hollow forms, as often the inside dries slower than the outside. Simply suspend an iridescent bulb into your form, making sure it’s centered and not touching the clay. The heat generated by the bulb will help things along. Keep a close eye on its progress though, as you don’t want to cause the reverse of what you started with, where the inside dries faster than the outside.
Candling
This is a super common trick used by artists to speed up the drying, and it refers to using your kiln on a low temperature to help with the final stages of drying. Simply load your kiln as normal, then set a ramp of 50-75F/hour (10-25C/hour) up to 176F (80C), then hold for an hour or two. From here, you can program your bisque as normal. Avoid placing very wet work in the kiln, however, as excess moisture can be hard on the elements.
Firing: The Final Stage of Drying
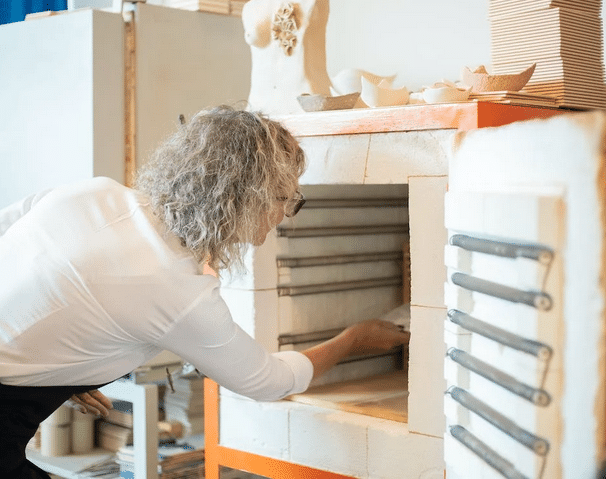
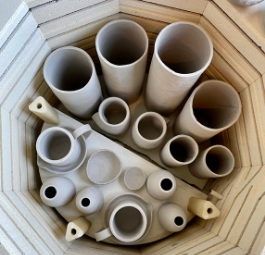
So you’ve carefully followed all the steps for building and drying, your piece looks and feels bone dry, and you’ve loaded it in the kiln. You’re finished and in the clear, right? Not quite! You’ve got one more step to go to complete your drying process, and that’s the bisque firing.
Even though you’ve done everything you can to remove the water from your clay, there’s still some there. As we mentioned at the start of this article, this is because the molecules that make up your clay are chemically bonded to molecules of water. When we add heat with the kiln, this bond is broken and that last bit of water evaporates away. This phase, known as dehydroxylation, occurs up to 1022F (550C), where the other delicate part of the firing process, quartz inversion, also starts to occur.
This is a stressful process for the clay. If it’s done too quickly, the releasing water turns to steam within the clay walls faster than it can escape, building pressure which causes cracks and explosions. To prevent this, we must fire slowly through this phase. So, when programming your bisque, do a slow ramp of about 80-100F/hour from 950-1100F (26-37C/hr to 510-593C). It’s that simple!
Mastering the art of drying ceramics is crucial to preserving the integrity of your hard work and avoiding the heartbreak of cracked or ruined pieces. As we’ve explored in this blog, moisture is often the main culprit behind such mishaps. However, armed with the right knowledge and techniques, you can conquer this challenge and ensure successful drying for your clay creations. From understanding the importance of even drying to implementing gradual drying methods, we’ve provided valuable tips and tricks to help you navigate this critical stage of the ceramic process. Remember to be patient and allow adequate time for the moisture to evaporate naturally, avoiding uneven airflow and sudden temperature changes that can lead to cracking or exploding in the kiln. By incorporating these drying techniques into your studio practice, you can enhance the longevity and quality of your ceramic pieces. So, embrace these guidelines, take care in the drying process, and enjoy the satisfaction of seeing your beautifully dried ceramics emerge unscathed from the kiln, ready to be admired and cherished for years to come.
Now that you are feeling more confident in your drying skills, you’re ready to level up your making. We’ve got tons of courses available at The Ceramic School to suit all types of makers, so be sure to have a look and sign up for one today!


Responses