When it comes to trimming there is no one single way to trim every piece. Some pieces will require special attention and methods to ensure that they survive the trimming process. Chucks will help potters trim everything from cups, chip and dip platters, teapots, altered vases and many more unique and sometimes strangely shaped pieces. One of the strongest appeals to chucks is that you can easily make them yourself to fit whatever trimming situation you might be in. In this article, we will be discussing how to make your own chuck and some tips and advice when it comes to chucks.
How To Make Your Own Chuck
First, there are two different ways to approach chucks. Do you want to throw it, let it dry until leather hard, trim your piece, and then reclaim the chuck? Or do you want to throw, trim, bisque the chuck, and then use it over and over to trim work? You can also do both methods by having a chuck or multiple chucks of different shapes and sizes that are bisqued, and then throwing a chuck when something really specific is needed. Either way, the steps for throwing the chuck will be the same.
Throwing a Chuck

There are different shapes that chucks can be and this will depend on if you want the chuck to hold the outside or the inside of the pot. If your form has a small neck, long neck, and otherwise cannot have something fit inside of the opening you will want to go with the chuck that will hold the outside of the form. If you have forms that have multiple pieces attached to it, geometric shapes, or delicate lips and have an opening that is wide enough to fit a tall and narrow chuck inside of it then you will want to go with the narrower chuck.
Throwing the Wider Chuck
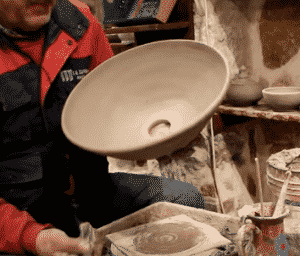
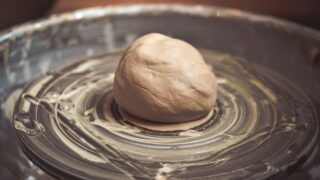
When throwing the wider chuck it will involve more clay. The shape you are trying to achieve is similar to a cooling tank at a nuclear plant. You will need to wedge around five or more pounds of clay. Once you have wedged your clay and it is ready to go you will place it on the wheel. Sometimes it can be hard to get a proper seal on the wheel with your clay so slamming it down quickly and efficiently will ensure it is properly sealed. Once it is properly sealed to the wheel you can begin to center the clay.
If you find that it is hard to center then coning upwards and downwards again will pull the clay up and help to shift the clay towards the center of the wheel. After the clay is centered on the wheel you will open it at a 45-degree angle with both hands and compress the bottom. When the bottom is compressed you can then begin to slowly pull starting from the bottom and using consistent pressure pull up. As you get close to the rim of the chuck you will ease off avoid the rim from getting pulled too hard and becoming lopsided.
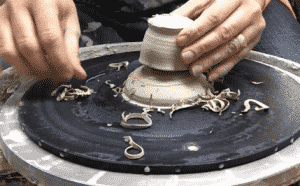
If you are going to reclaim the chuck after trimming then it does not matter if the walls are thicker, but it matters if the rim and chuck are level and centered. Once it is leveled and centered then you will open the top of the chuck to allow the circumference of your piece to fit inside of it. Checking with calipers is the best way to ensure that your piece will fit. If you are going to reclaim the chuck it is important to let the chuck dry out to leather hard on the wheel, either by using a hairdryer or torch. This will allow you to place your piece inside without sticking or damaging of the surface. Since the chuck and piece will be in the same state it will be easier to place clay where your piece and the chuck meet. The clay should stay attached very easily and no issues should come from trimming. Once you are done trimming and take your piece out you can cut it off and reclaim it.
There is another variety you can add to your chuck if you are keeping it. Before you cut it off the wheel you can open the bottom of the chuck to slightly smaller diameter than the top or even smaller if you would prefer. Once it is cut off the wheel you can flip it over and trim away any sharp edges and smooth it out with a sponge. This opened end of the chuck allows you to trim pieces that are smaller than the circumference at the top of the chuck. When you are planning on keeping your chuck to bisque letting it dry out slowly to bisque is important.
Throwing the Narrower Chuck
When throwing the narrower chuck you require less clay. So throwing around 3 or more pounds of clay should be more than enough. The shape you are trying to achieve is similar to a spout with a flared bottom. This spout will allow you to fit it inside of forms such as cylinders, teapots, and cups just to name a few. The flared base will make it easier to attach to the wheel when it is bisqued and keep the chuck from tipping over from the weight on the spout. This form is more delicate so it is recommended that you bisque it before trying to trim on it. Otherwise, the weight of your piece could cause the spout to bend or completely snap off.
When throwing you go through similar steps as throwing the wider chuck. Wedging, centering, and opening are the same. The main difference is that you will actually open to the bottom of the piece so that it is completely hollow and uses less clay. Once you can see the wheel or bat through the bottom you will collar in the clay. Remember to leave some clay near the base so you can create a proper flared bottom using your hands and a rib. Leaving the bottom of your piece wider than the rest of it will help to create the flare. Compressing the lip of your chuck and then starting to pull upwards and collar after each pull will create the spout look. It is best to be safe when pulling so that you do not throw the spout off centered. Once you have pulled and collared in your clay enough to be happy with the thickness it is time to slightly flare the rim of the spout and smooth it. After this is done and you think that the circumference of the rim will fit inside whatever you may throw it is time to cut it off. Cleaning up the bottom of the chuck to ensure it is not rough will make it easier to handle when it is bisqued. Remember to let the chuck dry very slow. Slow drying is important since the spout can potentially warp during drying because of its height.
When Using a Bisqued Chuck

When using a chuck that has been bisqued it is important to keep it saturated with water. This helps with trimming immensely. If a chuck is bone dry then the clay that is attaching your piece to the chuck will not stay and can fly off along with your piece. It is best to keep it in a bucket full of water until it is time to use it so that it will be fully saturated and ready to go. When using the narrower chuck remember to add a coil to the top of the chuck. This will help prevent the chuck from marring the inside of your piece and help it stay attached to the chuck easier. It is best to either center the coil on the pottery wheel with water and letting it dry to leather hard or just trimming the coil to center when it becomes hard. When using the coil method on the chuck it can be helpful to match the shape of the inside of your piece using the coil. This will ensure that it is the widest and highest part and if it is not then your piece will not sit correctly on the chuck.

In conclusion, chucks are very helpful when it comes to trimming pieces that cannot just lay upside down on the wheel to be trimmed. They will help when it comes to trimming unique and interesting forms so don’t shy away from trying to make a few and use them when you trim. You could find you actually enjoy trimming once you have a helpful tool to make trimming easier.


Responses