In this video, we see John Britt showing us how he creates ceramic luminaries for candles.
John Britt is a studio potter in Baskerville, North Carolina. John is a self-taught potter who has taught and worked extensively at many locations including at Penland School of Crafts. John is also the author of The Complete Guide to High-Fire Glazes and The Complete Guide to Midrange Glazes. John’s work focuses on experimentation with glazes in different ranges and colors.
Pottery Throwing – Making Ceramic Luminaries
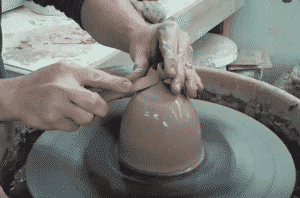
John starts with saying that this is a closed-form technique and then shows off some different closed forms that can be made such as birdhouses, jars, and salt pigs just to name a few. He then goes to the wheel and beings centering a ball of clay on a bat. John quickly centers using his hands and a wet sponge and then opens the form and leaves a floor for the clay so it has a base instead of going straight to the bat. He flattens the bottom using a wooden rib and then swiftly pulls up and then collars in. John points out that it is nice to not have thick walls when cutting out the designs for the luminaries and recommends using thinner walls. He continues to pull and collar in and then cleans up with a rib to smooth out the form. John closes off the top of the form by collaring in and using a rib to angle and close off the form while pinching off the excess clay on top. John finishes the form with some final ribs to clean the surface and then moves onto carving the form.

Once John is done throwing his form he lets it sit to dry out and moves onto several already thrown forms. John says you can trim the bottom of the luminaries before they are carved, but if you do not want to trim the bottom then you don’t have to. It is important to remember to make enough room for your hand to fit inside of the form to place and remove the candle when you want. He shows us an already work in progress form that is partially cut out and points out some important information to remember.
The important information that John says is if you are carving a design and it has a sharp edge it can start to crack along that sharp edge and move up or down your piece depending on the design of the carved-out area. He then makes a horizontal line at the top of the sharp edge of the carving design and says it can potentially stop the crack from running any further up or down your piece.

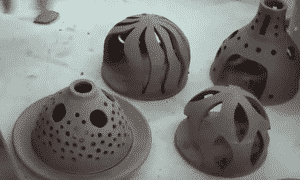
John says you should mess around with your design and to experiment to see how different carvings will affect your piece as it dries. He goes onto show other luminary forms that he has created which include holes of various sizes as the design instead of larger cutout designs to see if it will not crack as it dries. John’s final concluding form is an alternative version that can make it easier to place and remove the candle. It is a bottomless mound that is placed on a place which has a recessed area for the mound to sit. John compares this to an upside-down bowl that is placed onto the plate and then finishes off with saying that all of the things he has shown us are versions of each other.
To see more of John Britt’s work find him on Facebook as @JohnBrittPottery, YouTube as John Britt, and check out his website JohnBrittPottery.com.


Responses