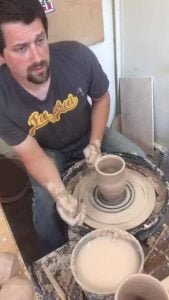
In this video, we see Dan from Ingleton Pottery demonstrating how to throw a cheese bell and plate on the wheel.
Who is Dan of Ingleton Pottery?
Dan is a potter from the Yorkshire Dales village of Ingleton, by the riverside. Dan is part of a small family run business that produces high fired and handthrown stoneware that was established in 1971. Dan’s work focuses on functional forms and educating others how to throw through instructional videos.
Throwing Making a Pottery Cheese Bell & Plate on the Wheel

Dan starts with placing the clay on the wheel and centering quickly and coning up and down. He opens the form slightly using the side of his thumb and then fully opens using both of his hands. Dan uses both of his hands to pull up the form and then pull outwards like a bowl with a small foot. He keeps doing this until he is satisfied with the height of the bowl and then goes back to shape the inside and outside with his hands more. Once he is satisfied with the final shape he removes the excess water on the inside, cleans the rim with a sponge, and then cuts away the excess clay from the bottom. Dan then lifts off the bat from the wheel and measures the width of the bell to estimate how wide the plate will have to be.
After Dan has the measurements for the plate he places a new bat on the wheel and centers new clay on the bat. Dan compresses down to center his clay using both of his hands and then checks his plate using the caliper. He draws the clay out with his hands to the outside to increase his width and then checks again, but needs to draw out more clay again to make the plate wider. This changes the shape of the plate from being smaller and taller to now being wider and shorter. Once Dan confirms that the bell will fit inside of the plate he shapes the rim and rolls it over slightly. Dan then finalizes the form by removing excess water, cleaning up with a sponge, and trimming the excess. He then lets the plate and bell sit until tomorrow so that he can see how they fit together and attach a knob to the top of the bell.
After Dan has the measurements for the plate he places a new bat on the pottery wheel and centers new clay on the bat. Dan compresses down to center his clay using both of his hands and then checks his plate using the caliper. He draws the clay out with his hands to the outside to increase his width and then checks again, but needs to draw out more clay again to make the plate wider. This changes the shape of the plate from being smaller and taller to now being wider and shorter. Once Dan confirms that the bell will fit inside of the plate he shapes the rim and rolls it over slightly. Dan then finalizes the form by removing excess water, cleaning up with a sponge, and trimming the excess. He then lets the plate and bell sit until tomorrow so that he can see how they fit together and attach a knob to the top of the bell.
The next day Dan starts by trimming away excess clay from the bottom of his plate with a trimming tool and then creates a design on the plate using slip and his finger. Once the decoration is done he cuts off the plate from the bat and moves onto the bell. Dan trims off the excess from the outside of the bowl using a trimming tool and then stops the wheel and cuts off the bell from the bat. He places a new bat on the wheel that has specific lines that assist with centering the form and then places the bell on it so he can trim the bottom. Dan then keeps the bell on the bat by placing three balls of clay around the form to hold it down. After the bell is attached to the wheel Dan beings to trim and smooth the top of the bell and then uses slip to decorate the top of the bell. Dan has premade a mouse knob beforehand to attach to the bell. He attaches the mouse to the top of the bell by scoring both places and placing slip on the bell and then placing the mouse over the area. To ensure the mouse is properly attached he uses a small wooden tool to press down the edges of the mouse where it meets the bell. Once Dan has cleaned up the area with a sponge he presents the finished cheese bell and plate.
To see more of Dan’s work find him on YouTube as Ingleton Pottery, Instagram @pottery.videos, and Facebook as Ingleton Pottery: Pottery Making Videos.


Responses