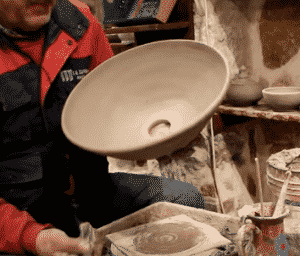
In this video, we see George Sifounios from Sifoutv Pottery demonstrating how to make a sink on the wheel.
George Sifounios is a potter from Leros Island, Greece. He has been a potter since he was 25. George focuses on teaching others how to do pottery through instructional videos. These videos cover topics from throwing, glazing, decorating, and other methods such as raku firing.
Potter Throwing – Making a Pottery Sink

To create a sink on the pottery wheel, you will need a lot of clay. George starts with a large ball of clay on the wheel and slowly centers it by coning up and down, and then pressing the centered clay back down onto the clay beneath it. He uses his two thumbs to create an opening and give him a spot to press down on the clay. Once he has centered the clay down to a more manageable height he uses two hands to compress and center the clay more. George uses his two thumbs to press down into the clay and open up the form to allow for pulling. Using a wooden rib to compress the bottom and sides of the form will ensure that it is level and an accurate reading for how deep the base it. You can check how thick your bottom is by pressing a needle tool into it and placing your finger where the edge of the clay is. When you pull it out the needle will reveal how much clay there is between your finger and the bat. After you are done checking the base of the form you will need to rib over the spot to reseal the clay back over the hole.
George begins to pull up the clay using one hand to pull while the other hand braces on the outside. He again pulls and switches his hands so that one is bracing and pulling the outside and the other is bracing the inside. Pulling from the bottom after each pull will ensure that all excess clay is moved from the bottom of the form to the top. Whatever you cannot pull can then be removed using a wooden or metal rib. George pulls and uses his rib to clean the form as he moves up and removes excess clay at the same time. Ribbing the inside of the form will bring out the desired angles needed in forms such as bowls. To open up a form into a bowl shape George uses the rib and braces it on the inside when he ribs the outside and the opposite when ribbing the inside. He keeps shaping the inside and outside of the form to slowly open it up and angle it outwards like a wide bowl. Shaping too quickly can cause your pieces to flop. George cleans up the rim of the bowl to ensure that it is rounded and smooth and then cuts a hole in the bottom of the bowl to make a hole for the drain. He then lets the bowl sit until it is ready to have a wider hole cut into the bottom to fit the drain more snugly.

Now that the form is leatherhard and can be flipped over it is time trim the hole and the bottom of the sink. George forms a curve to the bottom of the sink by removing excess clay and mimicking the form that is on the inside of the bowl. When trimming it is a good idea to burnish and clean the clay by using a metal or plastic rib to achieve this effect. George then uses a trimming tool to open up the hole more and cleans up the hole with his fingers and water. To finish the inside of the bowl George uses a metal rib and cleans up along the edges on the inside and then the sink is complete.
To see more of George’s work find him on YouTube as Sifoutv Pottery or on Facebook @sifoutvpottery.


Responses