Materials list
| Air Dry Clay | Check price on Amazon |
| Craft knife | Check price on Amazon |
| Mod Podge Sealer (optional) | Check price on Amazon |
| Acrylic Marker | Check price on Amazon |
| Paintbrush | Check price on Amazon |
| string | |
| rolling pin |
DIY Ghosts on Swings with Air-Dry Clay: A Fun Halloween Craft
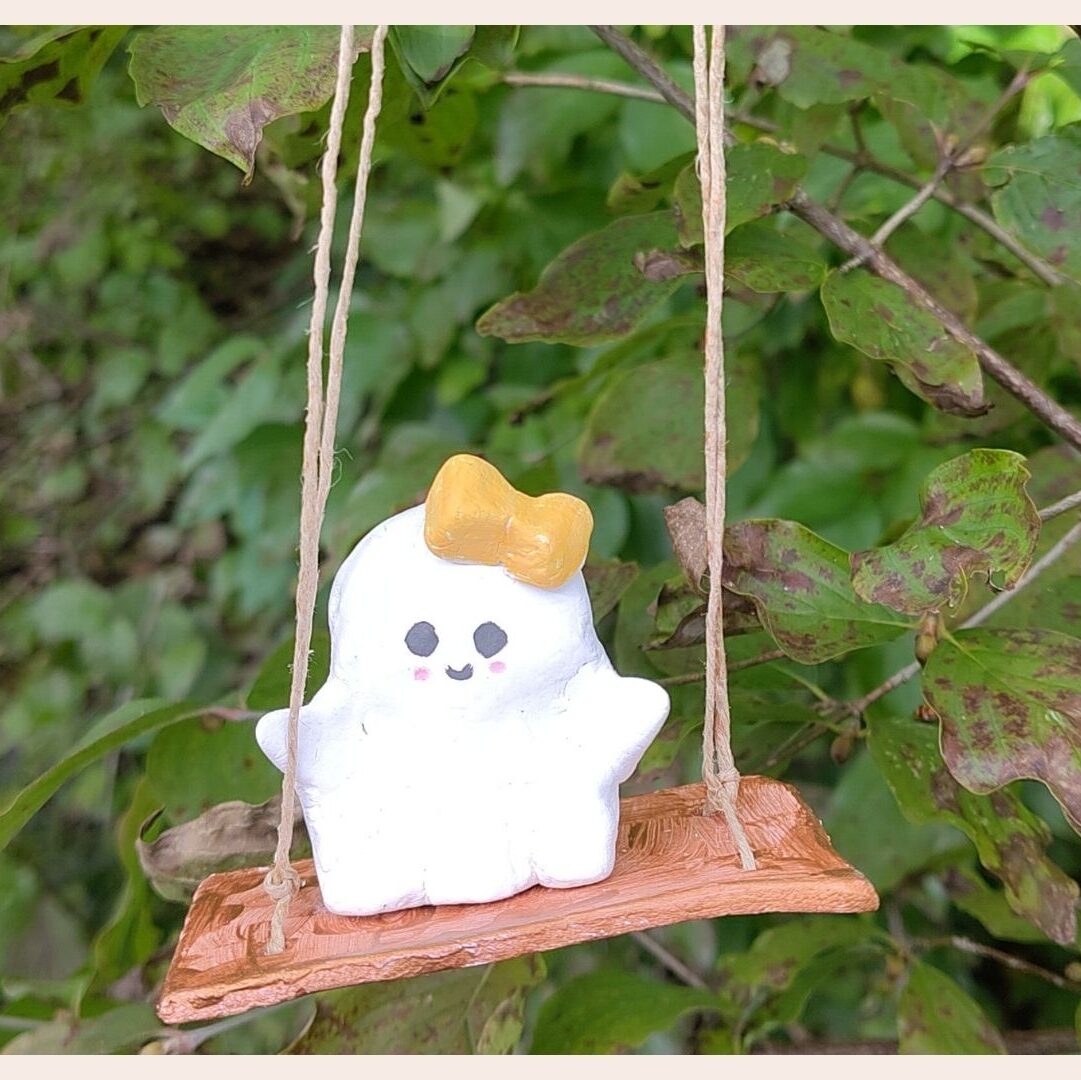
Looking for a cute and creative Halloween project? These air-dry clay ghost swings are the perfect addition to your spooky décor! Each ghost has its own personality—one wears a hat, another has a bow, and the smallest holds a balloon. They swing happily on little clay seats, and you can hang them on a branch or anywhere you like. Let’s get started!
Step 1: Create Your Ghosts
Start by kneading your air-dry clay until it’s soft and easy to shape. Take a chunk of clay to form your ghosts. You can make three ghosts, each in different sizes—just shape them however you like! It doesn’t have to be perfect, that’s what makes them fun and quirky.
Step 2: Add Fun Details
Now, it’s time to give each ghost its own special accessory! One will get a tiny hat, one gets a cute little bow, and the smallest ghost will hold a balloon. Simply mold small pieces of clay for these details. Get creative—this is where you can really personalize your ghosts! Once you’re happy with how they look, set the ghosts aside to dry completely. This usually takes 24-48 hours.
Step 3: Make the Swings
While your ghosts are drying, let’s move on to the swings! Roll out more clay and cut out rectangular shapes for each ghost’s seat. Remember to poke four small holes—two on each side of the rectangle—so you can thread the string through later. After cutting out your swings, leave them to dry.
Step 4: Paint Your Ghosts and Swings
Once everything is fully dry, it’s time to paint! Use acrylic markers or paints to give your ghosts cute, spooky faces. Let the paint dry before moving to the next step.
Step 5: Assemble the Ghost Swings
Now it’s time to put it all together. Cut pieces of string and thread them through the holes on the sides of each swing. Tie knots at the ends to secure the string. Once your ghosts are seated on their swings, they’re ready to hang!
Step 6: Display Your Creations
You can now hang your ghost swings on a branch, a hook, or anywhere that needs a little Halloween spirit! These adorable swinging ghosts will add a fun, spooky touch to your home.
And there you have it! A fun and easy way to create Halloween décor that’s both spooky and cute. I hope you enjoy making these little ghost swings as much as we did. Share your creations with us—we’d love to see how your ghosts turned out!


Responses