If you love cats and need a cute spot to store your jewelry or small items, this cat-shaped trinket dish made from air-dry clay is the perfect DIY project! It’s simple to create, and the result is both practical and adorable. Let’s dive into how to make your own little cat dish!
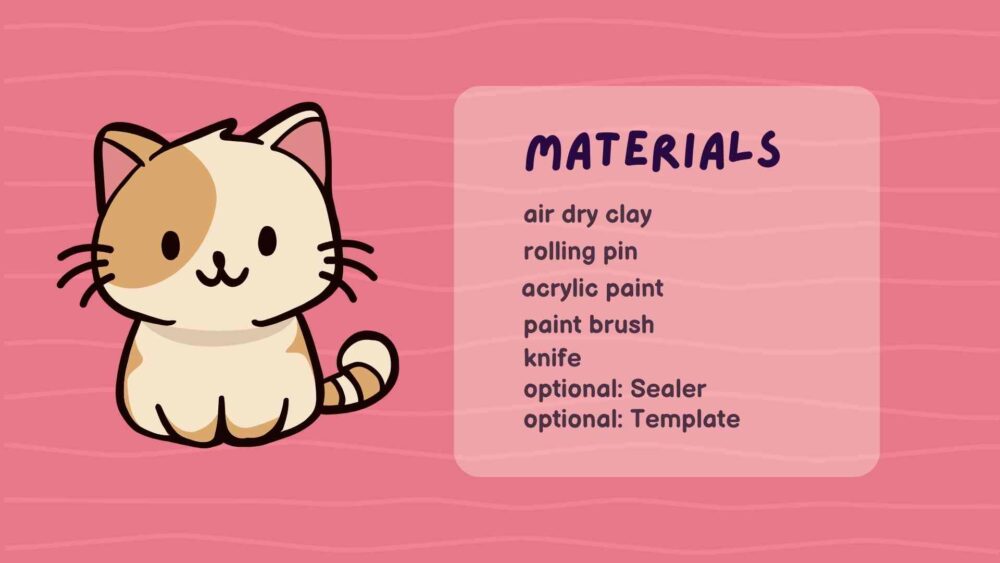
These are products I am using myself, however there are lots of other good options. When you buy through links on our site, we may earn an affiliate commission.
Step-by-Step Instructions:
1. Prepare the Clay
Start by kneading your air-dry clay until it becomes soft and pliable. This step helps remove any air bubbles and makes the clay easier to work with
2. Roll Out the Clay
Roll the clay out on a flat surface to about 1/4 inch thick. Keep the thickness even to ensure your dish is sturdy and durable.
3. Cut Out the Cat Face Shape
Using a craft knife or a clay cutter, cut a simple cat face shape from the rolled clay. Think of a rounded face with two pointy ears at the top. If you’re unsure about the shape, you can use the template.
4. Smooth the Edges
Dip your fingers or a small brush in water and gently smooth out the edges of the cat face, making sure there are no rough spots or uneven areas.
5. Make the Coil for Shaping
To give your trinket dish its curved shape, roll out a long, thin coil of clay (about 1/4 inch thick). Place the coil around the edge of the cat face, pressing it lightly to secure. This coil will act as a support to slightly raise the edges of the dish, creating a shallow bowl shape.
6. Attach the Coil
Smooth the coil into the edges of the cat face, blending the seam where they meet. Use water to help smooth out any visible lines. This will give the dish its curved, raised shape while keeping the cat face flat in the center.
7. Let the Clay Dry
Leave the dish to air dry for 24–48 hours. Make sure it’s completely dry before painting. Check to ensure the edges are holding their shape as it dries
8. Paint the Cat Face
Once the clay is fully dry, use acrylic paints to add cat-like features—such as eyes, a nose, and whiskers. Get creative with colors and patterns if you like!
9. Seal the Dish (Optional)
Once the paint is dry, apply a clear sealer or varnish to protect your design and give the dish a glossy finish. This step is optional but recommended for durability.
10. Let it Dry Again
Allow the sealer or varnish to dry fully before using your trinket dish.
And that’s it! You’ve created a charming, personalized cat face trinket dish. Perfect for holding small treasures like jewelry or keys.


Responses