In this video, Janis Wilson Hughes from Evolution Stoneware Pottery demonstrates how to make a wine goblet.
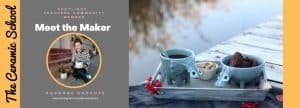
Janis Wilson Hughes is a potter from Johnson City, Tennessee. Her work focuses on functional tableware that mainly relates to bottle forms and containers for liquids. These items range from decanters, olive oil bottles, mugs, teapots, and cups. Her work is brightly colored blues mainly with accents of brown towards the top of her forms. Her forms have a theme movement throughout them. When she is not focusing on functional forms her work can become more sculptural like such as totems that could appear in nature and other stacked forms. Janis has been featured in many ceramic articles such as the Clay Times Magazine and Pottery Making Illustrated Magazine along with having many instructional videos available on YouTube to teach others.
Steps in Making a Wine Goblet in a Wheel
Janis starts with the base of the wine goblet which is a half-pound of white stoneware. She specifies that she is going to do a half-inch wide base, the top will be an inch and a half, and the height will be around five inches. She centers and then opens her form all the way to the bat and begins to quickly pull up. Janis starts with a wider base and she pulls and pulls inwards to create a coning effect. Coning is then used to make the rest of the form thinner than the base and Janis checks the height once she has pulled up enough clay. Janis cuts the excess clay from the top to level the clay and then continues to pull up and flare out the top. She uses a rib to clean off the form and steadies the top as she does so. Janis shows off another tool that she has made, which is a bisqued fired clay rib. She then uses this rib to create spirals in the base of the goblet up the form. Then the bottom of the base is cut with a wooden knife
Janis starts with three-quarters of a pound of clay in the same clay and centers the clay quickly. She opens with her two thumbs while specifying that the inside of the shape matters more than the outside. The reason for this is that she will be trimming the bottom of the cup to be completely round. Janis opens and pulls up quickly in one smooth motion to create a bell shape cup. The cup needs to be bigger than needed since shrinkage will occur and less wine can be held later. As the cup is formed and then the excess clay is removed Janis talks about tapering in the clay so the rim is thinner. This makes it more pleasing for people to drink from the cup and a curve under the rim gives people a place to rest the cup against their lip. The shape gets finished off by Janis with some final touches and then the stem and cup are left to dry until they are leatherhard.

Now that the stem and cup are leatherhard it is time to trim them. Janis hand trims the base of the stem on the inside in order to remove excess clay and lighten up the stem. She uses an exacto knife
Janis places the cup on the top of the stem to see where it will look best. The cup is adjusted until it sits completely level and then it is marked where the cup sits on the stem with a tool as Janis spins the pottery wheel slowly by hand. Now that there are marks on the bottom of the cup where it will meet the stem it is scored with a tool along with the stem. Janis attaches the two pieces using water, but says that you can use slip as well. The cup and stem are pressed down together and then the steam is smoothed down by hand until they are securely attached together. Janis finishes off the piece by stamping her brand into the base of the cup to easily identify that it is her work.
To see more of Janis Wilson Hughes’ work find her on YouTube as EvolutionStoneware, Facebook @EvolutionStoneware and check out her website evolutionstoneware.com.

Responses