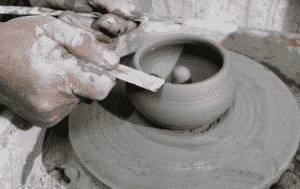
In this video, we see John Britt showing us how he creates a juicer for fruits such as lemons, limes, and oranges.
John Britt is a studio potter in Baskerville, North Carolina. John is a self-taught potter who has taught and worked extensively at many locations including at Penland School of Crafts. John is also the author of The Complete Guide to High-Fire Glazes and The Complete Guide to Midrange Glazes. John’s work focuses on experimentation with glazes in different ranges and colors.
How To Make a Juicer with The Closed Cylinder Technique

John starts with saying it is a closed form technique and then starts centering a ball of clay on the wheel. Once it is centered he flattens out the clay to the circumference of the base he wants for his juicer. After that John opens up his form down to the wheel head where the juicer head will be. John cleans up the opening with the flattened end of a wooden tool and then presses down and opens up the form a little to create the dish area that will collect the juices. He then pulls the clay up around the opening in the center to create the closed form for the juicer. John cuts off the uneven rim of the juicer form and then closes off the top by pulling and compressing the rim until it is closed. He cuts off the excess clay that is not needed from the top of the form and cleans up the juicer form using a metal rib to smooth it out. After that John finishes up the outside of the form by pulling up and curving out like a bowl. He leaves the bowl part of the form thicker in order to create a spout and shapes the inside using a plastic rib.

Once John is done throwing he creates a spout by shaping a small section of the bowl area with two of his fingers. John pinches with two of his fingers on the area and pulls it lightly and quickly until the spout is formed the way he desires it. He finishes it off by creating a final groove with one finger as he slides it up and out of the spout. John then moves on to an already thrown juicer to show us how he creates the grooves. He draws lines where he wants the grooves to be and then will dig in with the edge of a trimming tool. John goes on to say that after the grooves are complete you will clean it up and the form will be done.
To see more of John Britt’s work find him on Facebook as @JohnBrittPottery, YouTube as John Britt, and check out his website JohnBrittPottery.com.


Responses