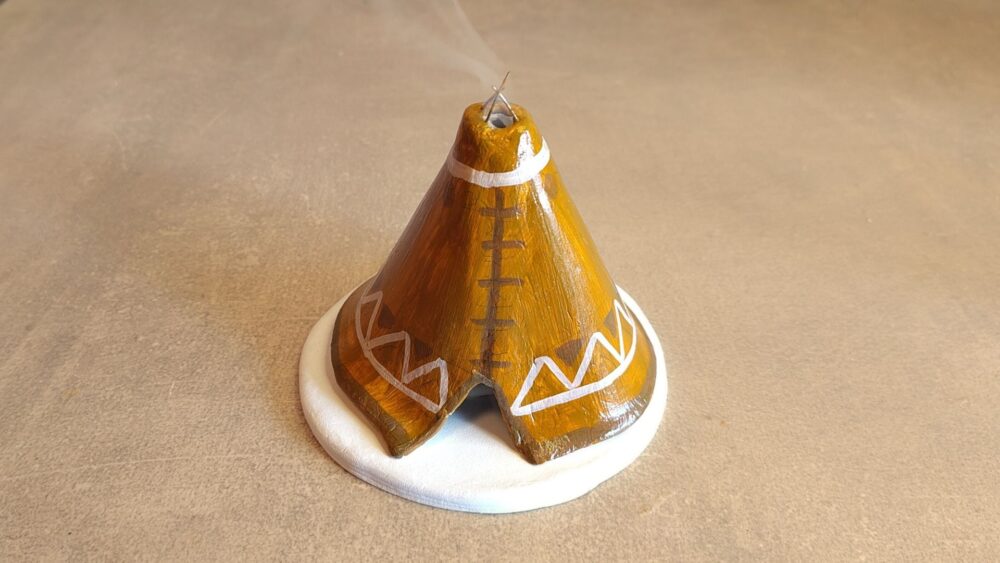
This little clay piece brings a gentle, grounding feel to your space. Place an incense cone inside, and as the fragrant smoke rises through the opening at the top, it echoes the warmth and stillness of gathering around a fire. It’s a thoughtful way to enjoy your favorite scents — especially on quiet autumn evenings.
Materials list
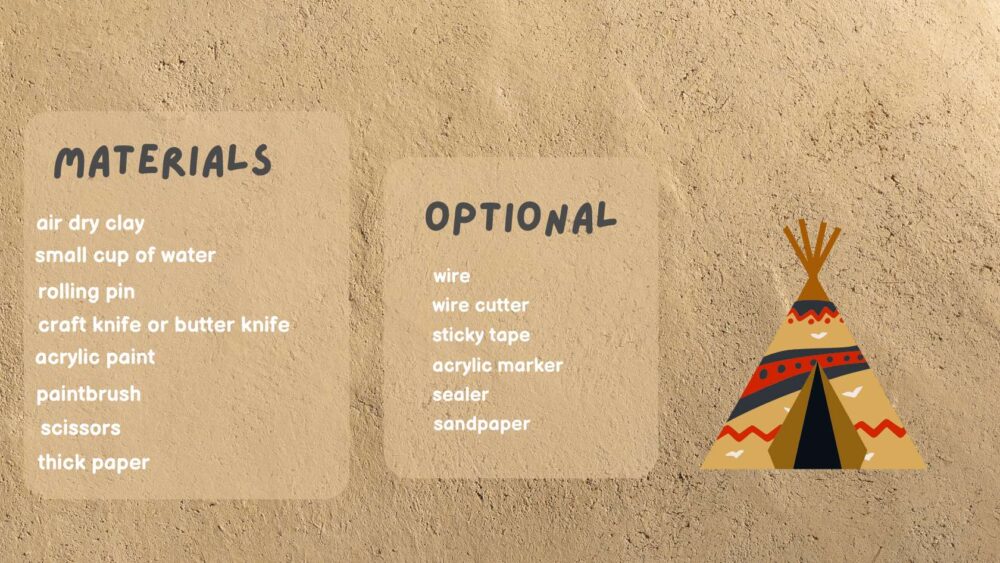
These are products I am using myself, however there are lots of other good options. When you buy through links on our site, we may earn an affiliate commission.
Step-by-Step Instructions:
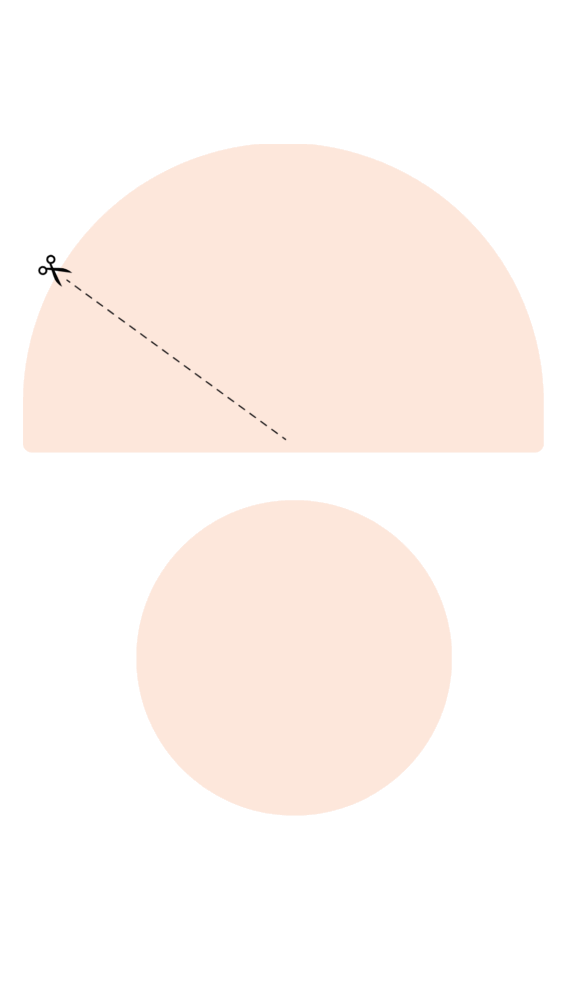
1. Print and Cut the Stencil
First, print out the stencil and carefully cut it out.
2. Cut the Thick Paper
Next, use the stencil to trace and cut the shape from a piece of thick paper.
3. Form the Paper Base
Roll the paper into a cone shape and secure it with tape or glue. This will help the teepee hold its form as the clay dries.
4. Prepare the Clay
Roll out the clay into a flat sheet, about a quarter-inch thick, and cut out the shape for the teepee.
5. Wrap the Clay
Wrap the clay around the paper cone. Press the edges together to seal the seam, then smooth it out with your fingers.
6. Add Details
Take some wire and cut small pieces to place on top of the teepee for decoration.
7. Create the Base
Roll out another piece of clay to form a flat circle slightly larger than the bottom of the clay cone, which will act as the base.
8. Let it Dry
Allow the clay teepee to dry with the paper cone still inside. Drying may take 24 to 48 hours.
9. Smooth the Edges
Once dry, gently smooth any rough edges with sandpaper.
10. Add Color
If desired, paint your teepee with acrylic paints to add color and design.
11. Seal the Teepee
Apply a sealer to protect the teepee and give it a glossy finish.
12. Finish Up
And that’s it—your incense cone holder is complete!
There’s something special about shaping clay with your hands and turning it into something meaningful. This incense holder is more than just practical — it’s a reminder to pause, breathe, and create cozy rituals in your everyday life.
Print out the free Template:


Responses