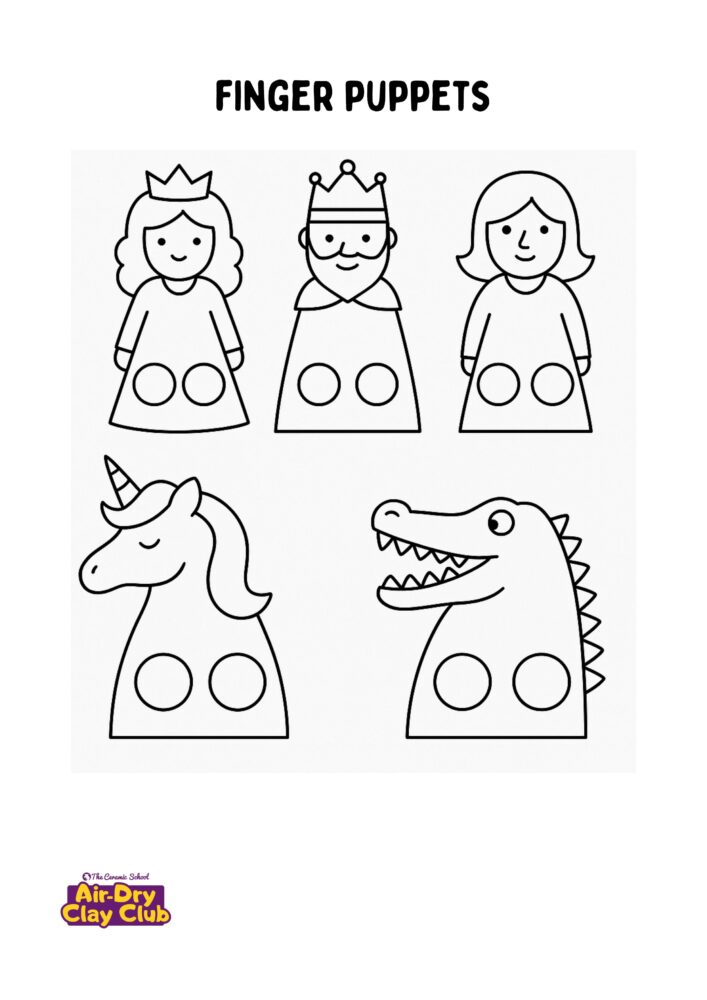
Finger puppets are a super fun way to play, tell stories and put on your own little puppet show! Today we’ll learn how to make them with air-dry clay.
What You’ll Need:
- Air-dry clay
- Template (hand-drawn or printed)
- Rolling pin
- A knife or clay tool
- hole maker or big straw
- Acrylic paint
- Acrylic marker
- Brushes
- A sealer (or resin if you want it extra shiny & strong
These are products I am using myself, however there are lots of other good options. When you buy through links on our site, we may earn an affiliate commission.
Step 1: Roll Out the Clay
Take a chunk of clay and roll it out flat, about the thickness of a cookie.
Step 2: Shape Your Puppet
Use a template (like a little body shape) or freestyle your own design.
Cut it out with a plastic knife or clay tool.
Step 3: Make Finger Holes
Make two holes for your fingers so your puppet can “walk.”
Tip: Make the holes a little bigger than your fingers, because the clay will shrink as it dries.
Step 4: Let It Dry
Place your puppet on a flat surface and let it dry completely.
This might take a day or two, depending on the thickness.
Step 5: Time to Paint
Bring your puppet to life!
- Use acrylic paint and a brush, or
- Try acrylic markers for easy details and doodles.
Add faces, clothes, patterns — whatever makes you smile.
Step 6: Make It Strong & Shiny
When the paint is dry, cover your puppet with a sealer to protect it.
Want it extra glossy and tough? Use resin for a glass-like finish.
Step 7: Tadaaa!
Slip your fingers into the holes and meet your brand-new clay finger puppet.
Now… let the puppet show begin!
Print Template:


Responses