
Throwing off the hump can save time when it comes to throwing multiple pieces in one sitting. There are certain precautions that must be taken in order for the thrown pieces to survive, but once the precautions are taken the thrown pieces will survive with little failure. In this article, we are going to discuss how to throw off the hump and the tips to ensure your work will be successful.
Steps for Throwing off the Hump
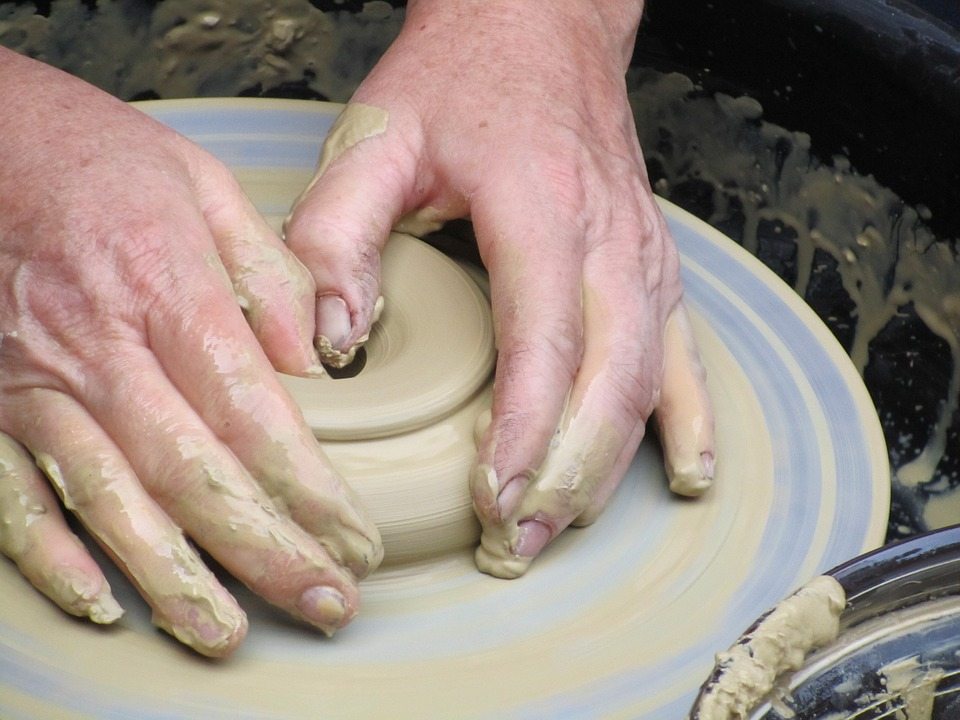
1 Wedging the clay
When you are throwing off the hump you will need a lot of clay. Usually, it is recommended to do around 25 pounds of clay so that you have a lot to work with and you can get a large sum of pieces from the hump. If you have a hard time wedging 25 pounds of clay all at once then you can do it in thirds and separate it into three groups to wedge. Once the 25 pounds of clay is wedged then it is time to place it on the wheel.
2 Centering
Once the clay is placed on the wheel it is time to center it. If you have three sections of clay that will add up to 25 you will center the first ball on the wheel and then slam the next ball on top of the first to attach it with force. Once the second ball is stuck to the centered clay you will center the second ball and repeat the process with the last ball of clay. After that, you will have one mound of clay that is centered and ready to be thrown. If you are placing the mound of clay on the wheel all as one piece then you will center it slowly by smacking it with your hands and fists to center it before using water and centering it starting from the top. Once the top is centered you will press down the clay and center the rest of the clay. After that, you will have a centered mound of clay that is ready to be taken to the next step.
3 Opening
Once all of the clay is centered, or you can just focus on centering the top mound if you don’t want to strain your wrists, you can pull up the top of the clay into a cone. This cone will be centered and then compressed down, but will still be separated by a groove so you know where you will be working. You will open at a 45-degree angle with both hands. Remember to compress the lip to ensure that it stays even and centered before you will pull up later on. Depending on how much trimming you will do to the form will decide how deep you will open to. If you plan to trim the foot into it instead of creating it while throwing then you will go halfway down to the groove instead of going two inches or so away from the groove.
4 Compressing
Compressing the bottom of the form is important to ensure that no cracks occur. They are more likely to occur when you throw off the hump since there is more clay underneath and it is harder to compress the clay together. Once you have compressed the bottom of the form and it is fit to the form you are desiring then you can go on the outside to reinforce the groove slightly if needed. The groove or form might get pushed out more than you desire when compressing the bottom, but this can be fixed when pulling during the next step. Remember if you are throwing mugs and other forms to have more of a flat and straight bottom, but throwing a bowl will mean you need to curve and flow the inside to match the outside curve.
5 Pulling
Once you have the opening it is time to start pulling your clay upwards. This is done in the same fashion that you would normally. It is important to compress the rim and remove excess water after each pull to ensure an easier time removing the piece from the hump later on. If you will be trimming the form to reveal your shape then it is a good idea to leave the walls a little thicker. If you are not going to be trimming the form and instead have the form already defined and done on the hump then you should ensure even wall thickness. It is important to consider how thick you will want your walls when shaping. If you are creating complex shapes it might be better to start with a little bit thicker walls than needed and remove the excess later using a metal or plastic rib.
6 Finish the form
Before you cut the form off of the hump you will finalize the form. To finalize the form, you will go over it with a rubber, metal, or wood rib to clean up. Then you will compress the bottom of the form and the lip and then clean the lip with a sponge
7 Make a notch in the bottom of the form
When the form is finished you will go over the notch that was created earlier. Some people will just squeeze off the piece with their fingers at the notch if they intend to trim the bottom of the form out instead of refining it and cutting it off with a wire tool. If you do not intend to create the bottom of the form extensively through trimming then you will make a cut in the notch with a needle tool to prepare a spot for the wire to fit into. This will allow you to know where exactly the wire will cut and hopefully prevent you from cutting too close to the inside of the form.
8 Cut the form and lift it off

Once the notch has been made for the wire you will ensure the wire is tightly pulled between your two fingers and slide it into the notch. You can turn the wheel slowly to let the wire cut through the form and remember to keep your hands level to ensure that the piece is cut level. Once the form has been cut off the hump you will gently lift it off with your hands or some pot lifters to ensure it does not get warped and then placed onto a nearby table or shelf.
9 Begin again
Once the form has been lifted off of the hump it is time to begin again at step 3 and continue on to step 8. You will repeat these steps over and over until you get the last amount of clay left on the wheel. Once you finish off the last section of clay on the wheel you will take it off and you can let all of the pieces dry to leather hard and then trim the bottoms.
In conclusion, it can be intimidating to throw off the hump for those who haven’t done it before or know the process. Once you learn and understand how it becomes less intimidating and effective for potters who want to throw multiple pieces in one sitting. We hope this article inspires you to throw off of the hump and try new things in the studio. Have you created something new using information from this article? Let us know in the comments below!


Responses