DIY Domino Set: Crafting Your Own Domino Tiles and Box with Air-Dry Clay
Hey there! If you’re in the mood for a fun and creative project, why not make your own set of dominoes with a matching box out of air-dry clay? It’s a perfect way to add a personal touch to your game nights, and it’s easier than you might think! Here’s a step-by-step guide to help you create your own domino set.
What You’ll Need

Materials:
These are products I am using myself, however there are lots of other good options. When you buy through links on our site, we may earn an affiliate commission.
Step by Step
Step 1: Making the Domino Tiles
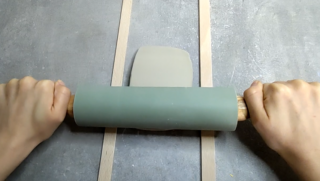
Prepare the Clay
Start by kneading your air-dry clay until it’s soft and easy to work with. This helps make it more pliable, so you can roll it out evenly. Once it’s nice and smooth, roll it out with a rolling pin until it’s about 1/4 inch thick. Keeping the thickness consistent will ensure all your domino tiles are uniform.
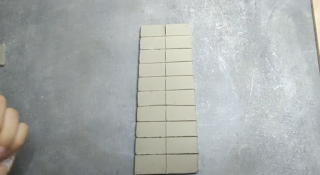
Cut Out the Tiles
Using the template or a ruler, mark out your domino shapes on the clay. Typically, a standard domino tile measures about 2 inches by 1 inch. Carefully cut out the shapes with a craft knife or another sharp tool, making sure to keep the edges clean and straight.
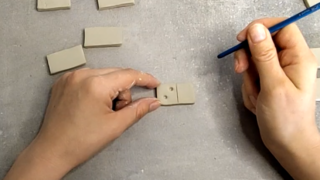
Add the Dots
Now for the fun part—adding the dots! Use the end of a paintbrush to press into the clay and create the dot patterns on each tile. This step gives your dominoes their classic look.
Step 2: Making the Box
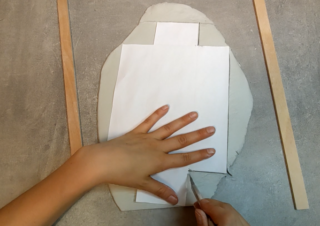
Cut the Base and Sides
Roll out another piece of clay to the same thickness as before. Using the template, cut out the base and sides of your box. The great thing about this template is that the sides are already attached to the bottom, making it super easy to fold up and assemble.
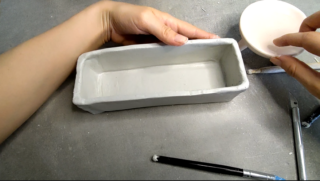
Assemble the Box
Gently fold up the sides of the clay piece and press them against the base. To help the edges stick together, use a bit of clay slip (which is just a mixture of clay and water). This will act like glue and seal the sides together. Smooth out any seams or rough edges with your fingers or a smoothing tool to give it a clean look.
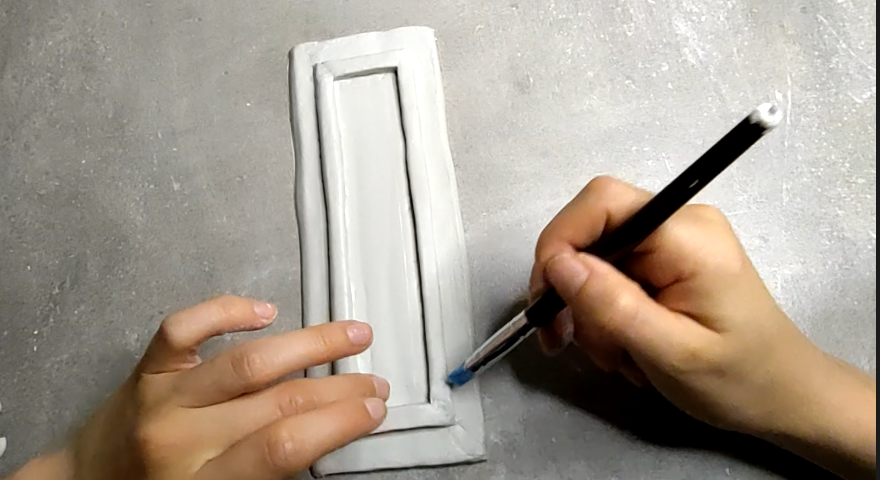
Make the Lid
For the lid, cut out a rectangle of clay using the template. If you want the lid to fit snugly, cut thin strips of clay and attach them to the inside edges of the lid—this step is optional but can help the lid stay in place better.
Step 3: Finishing Touches
Dry the Tiles and Box
Let your domino tiles and box dry completely. This usually takes about 24 to 48 hours, depending on the thickness of the clay. Make sure everything is fully dry before moving on.
Sand and Smooth
Once everything is dry, you can sand down any rough edges to give your tiles and box a smooth, polished finish. This step is optional but can really make your domino set look more professional.
Paint and Seal (Optional)
If you want to add some color or designs, now’s the time to get creative! Paint your dominoes and box with acrylic paints. Once the paint is dry, apply a clear sealer or varnish to protect your artwork and give everything a nice finish.
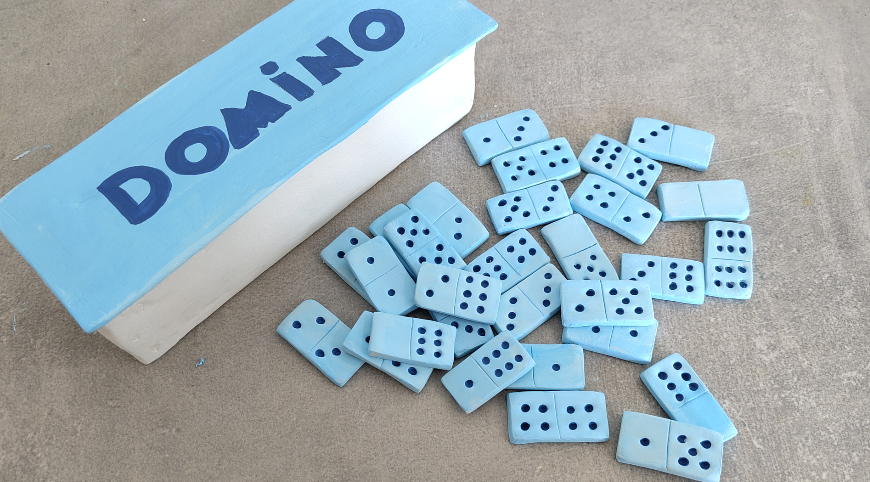
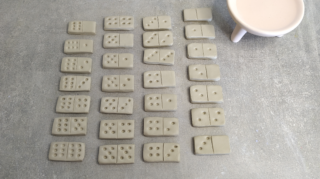
Step 4: Enjoy Your Game!
Once everything is dry and finished, place your dominoes inside the box, and you’re all set! You’ve just created your very own custom domino set.


Responses